Style SKU 
The Style SKU page allows users to define attributes and values using the Bill of Material dimensions. Administrators can also configure the Style SKU page to match the business’ needs.
-
Select the Style drop-down arrow within the YuniquePLM ribbon.
-
Click on Style Search to open the Style Folder.
-
Locate and select a preferred style.
For further Style Folder information, refer to the Style Folder Overview User Guide.
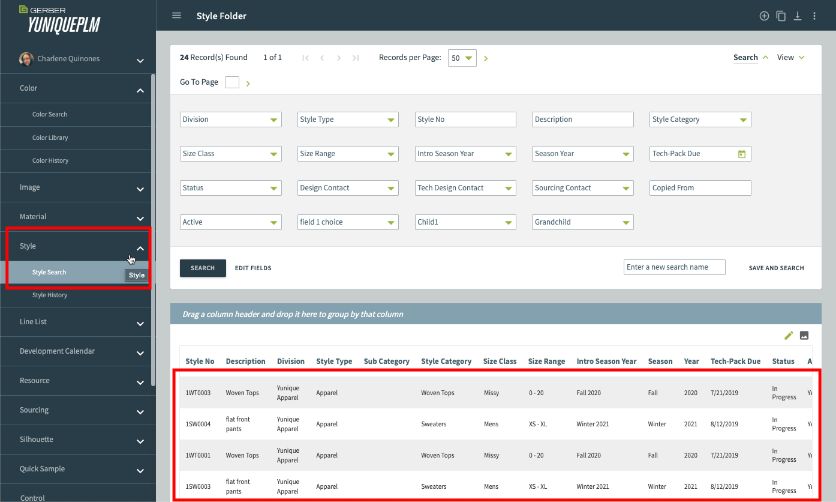
-
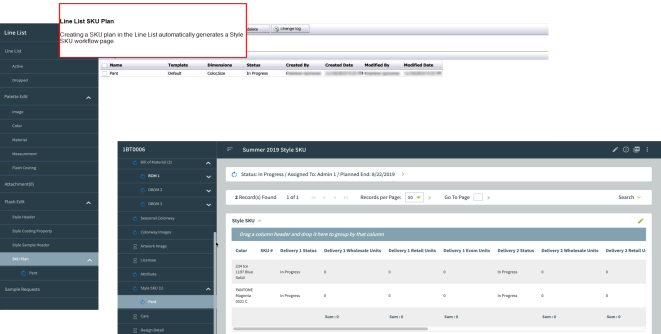
Select the Style SKU workflow to create a SKU page. This area may contain multiple SKU workflow pages similar to the BOM.

Style SKU Overview
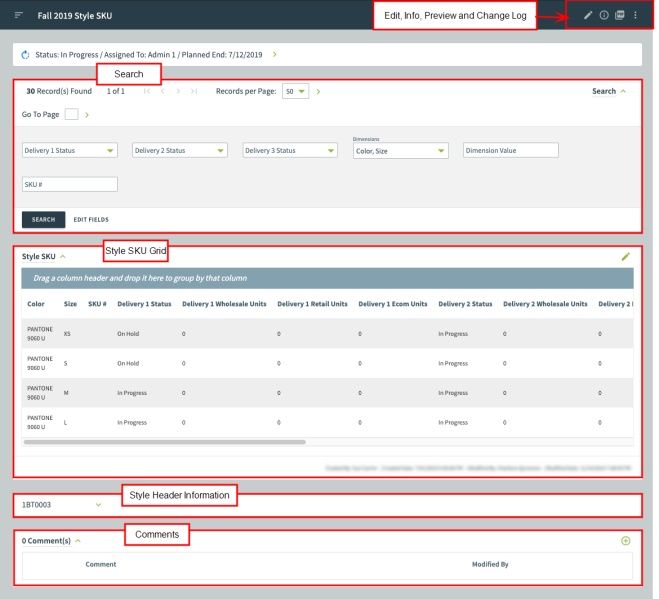
The workspace contains:
-
Edit: Configure the Style SKU page’s details.
-
Info: View details regarding this specific Style SKU page.
-
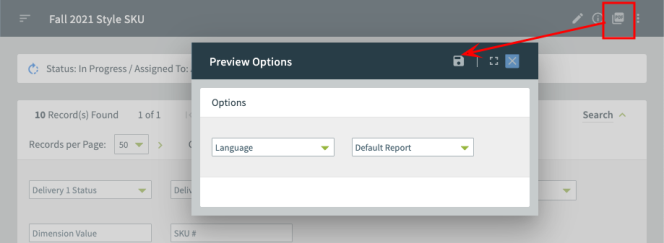
Preview: Modify the SKU’s print preview option by selecting a preferred language and report.
-
Change Log: View a list of changes made by the user throughout the Style SKU page.
-
Style Header Information: Lists details specific to the mentioned style number.
-
Comments: Add a comment to share with other viewers.
-
Search: Locate a specific SKU using the search fields.
-
Grid: Displays a list of styles categorized by the selected dimensions.
Create a Style SKU page
-
Click the Style SKU workflow link within the left navigation panel.
-
Click new to create a new Style SKU page.

-
Select a Workflow Item Type, Template and Printout.
-
Choose an available seasonal Bill of Material to link the existing style SKU page.
-
Give the SKU page an Item Name.
-
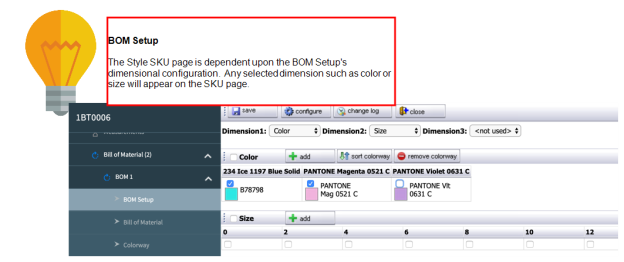
Each dimension configured within the BOM Setup page is listed in the Dimension field. If more than one dimension is available, another drop-down list is shown. Select a Dimension available to the selected BOM.
-
Press add to save the addition and open the Style SKU workflow page.

-
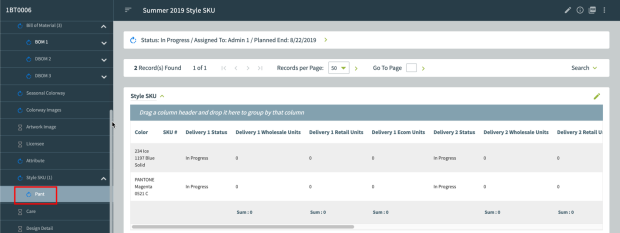
The new SKU page is listed in the left navigation panel. Select the new SKU workflow to view its page.
View and Edit a Style SKU page
-
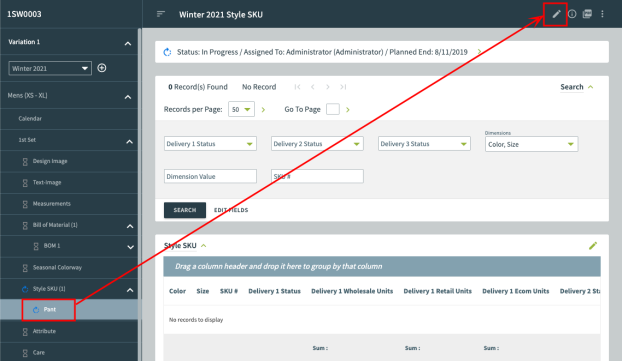
Select a SKU workflow page under the Style SKU heading in the left navigation bar, then press edit.
-
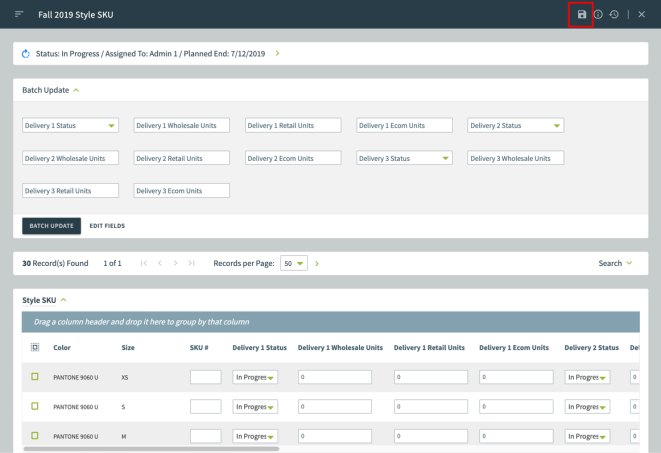
A new window opens displaying the Style SKU area with a list of various SKU combinations that are pulled from the Bill of Material. Make any desired modifications to the grid. Press save when complete.
Updating Multiple Styles
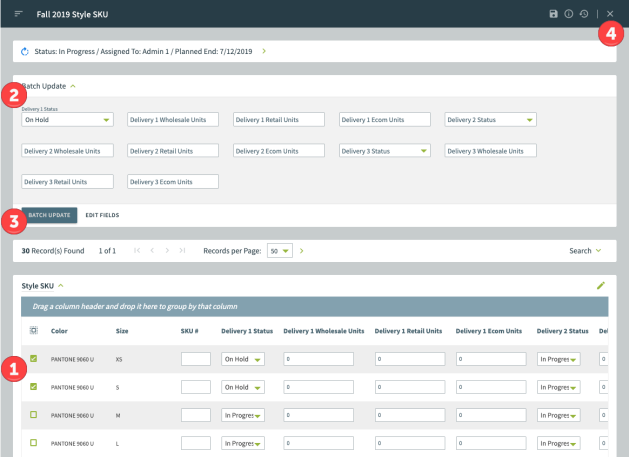
The Batch Update area of the SKU page allows the user to mass update multiple SKU’s at once.
-
Select SKU combinations listed in the grid.
-
Modify the Batch Update area fields.
-
Select Batch Update to update the selected SKU’s.
-
Return to the primary Style SKU page by pressing close.
Comments
Include a note or instructions affecting this style.
-
Scroll to the bottom of the SKU page and expand the Comment section by clicking the green arrow.
-
Press the + Add New button.

-
Type comments into the textbox, then press the save button.

-
Now the newly added comment appears in the Comment(s) section. Click the pencil icon to edit the existing comments or click the + Add New button
to enter additional comments if needed.

Preview
The Preview Options window allows users to select a preferred language and report for later printing.
Change Log
Review a detailed list of changes made to a particular area by selecting the menu and clicking Change Log.
For further information, refer to the Change Log User Guide.
