Overview 
The Style Folder Text - Image workflow page offers users three workflow types to enter necessary text and image data together or independently. The text & image, text only or image only workflows can be used to communicate artwork, packaging designs, packaging placements, etc.
Accessing Text - Image
-
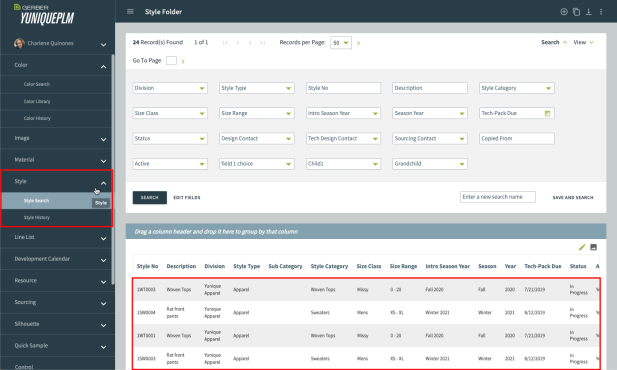
Select the Style drop-down arrow within the YuniquePLM ribbon.
-
Click on Style Search to open the Style Folder.
-
Locate and select a preferred style.
For further Style Folder information, refer to the Style Folder Overview User Guide.

-
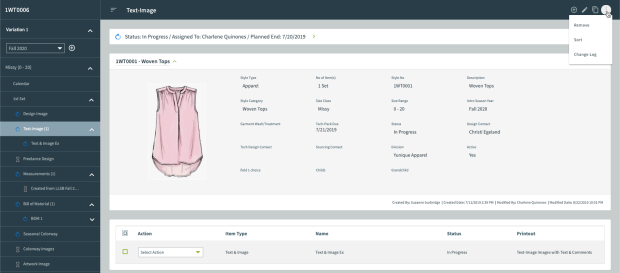
Select the Text - Image link to open its workflow page.

-
New: Add new text-image workflow page(s).
-
Edit: Modify the existing text-image page name.
-
Copy: Duplicate a text-image workflow page from another style.
-
Remove: Delete a text-image workflow page.
-
Sort: Reorder the listed text-image workflow pages within the new text-image data area.
-
Change Log: Lists all additions and modifications within the styles text-image page.
-
Style Header Information: Expand the Style Header, using the green arrow, to reveal the style’s details.
-
New Text-Image Workflow Pages: Lists all text-image, text-only and image only workflow pages where you can view, edit or make a copy of an existing workflow page.
-
Edit: Modify the existing text-image data.
-
Preview: View a report containing all of the text-image pages.
-
Change Log: Lists all additions and modifications within the styles text-image page.
-
Comment: Add a comment to share with other viewers.
-
Text-Image Workflow with Images: Lists all images once uploaded along with its detailed comments.
-
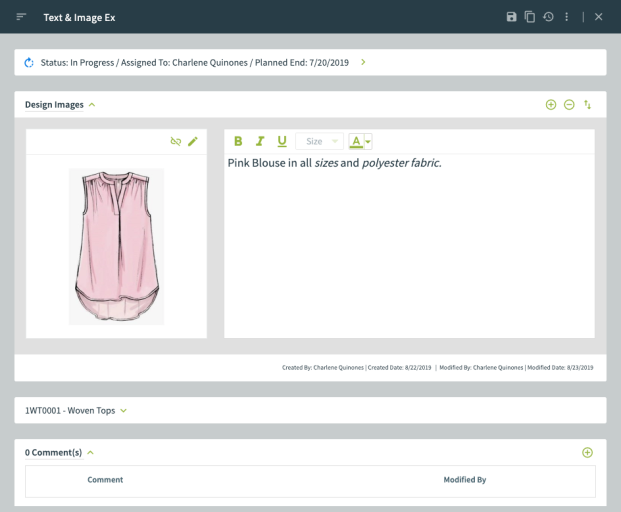
Save: Keep the newly added image descriptions.
-
Create Image: Add a new image. Refer to the Image User Guide for further information.
-
Select Image: Choose from a list of existing images. Refer to the Image User Guide for further information.
-
Sort: Reorder the current text-image workflow pages.
-
Copy: Duplicate a text-image workflow page from another style. Refer to the Image User Guide for further information.
-
Remove: Delete an image from the text-image workflow page.
-
Close: Closes the edit window and returns to the text-image view page.
-
Change Log: Lists all additions and modifications within the styles text-image page.
-
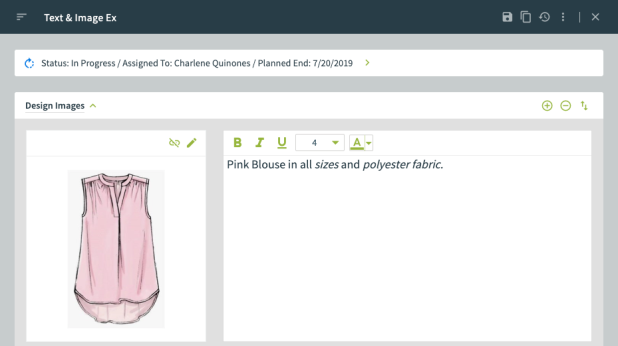
Edit Image: Use to replace the current selection with an image stored on your hard drive or via a third-party application. Refer to the Image Folder User Guide for further information.
-
Break Link: Images saved to a particular style are linked to multiple size class variations. Any edits made to an image within a style will also apply to all size classes. Once the Break link button is selected, the image is ‘unlinked’ from all size classes, except the current residing size class. Now the user can make modifications to the newly unlinked image.
-
Text Box area: Enter pertinent information related to the associated image.
Text - Image Main Page Overview

The workspace contains:
Text - Image View Overview

The workspace contains:
Text - Image Edit Overview

Text - Image Edit Overview

The workspace contains: