Style - Marker 
The Style - Marker page allows users to import and modify pattern information into YuniquePLM from the Gerber AccuMark system. An AccuMark PLM integration setup is required to add a Style Marker. More details can be found within the YuniquePLM AccuMark Integration user guide.
-
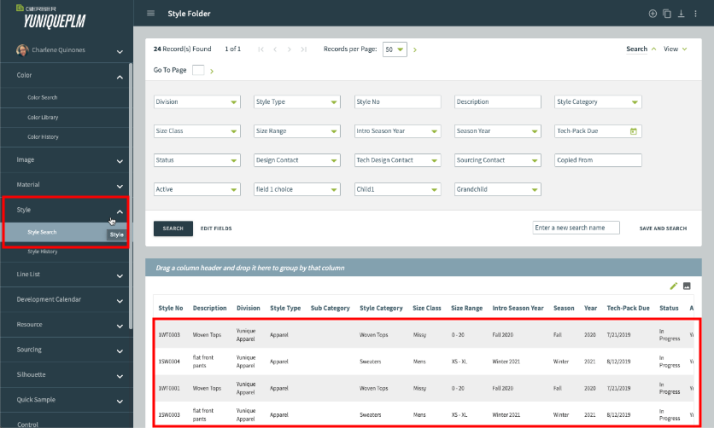
Select the Style drop-down arrow within the left-hand navigation bar.
-
Click on Style Search to open the Style Folder.
-
Locate and select a preferred Style.
Refer to the Style Folder Overview User Guide for further information.
-
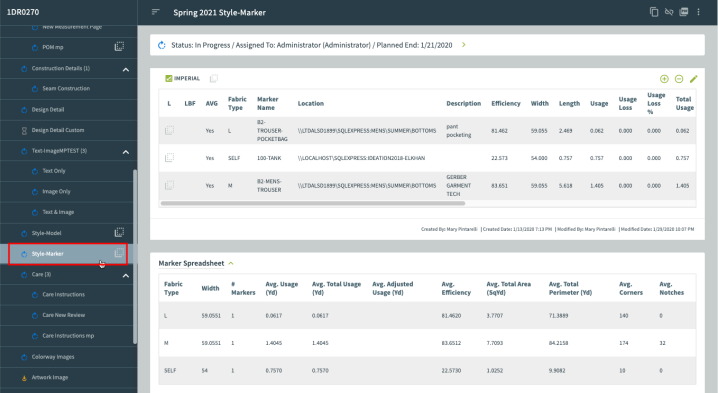
Select the Style - Marker workflow page.
Style - Marker Overview
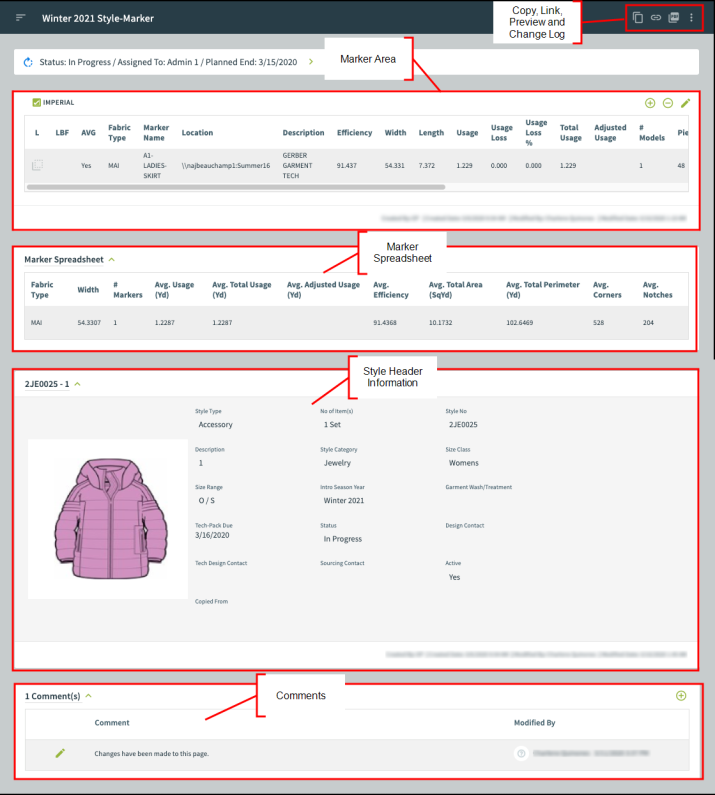
The workspace contains:
- Copy: Duplicate a Style Marker workflow page from another Style.
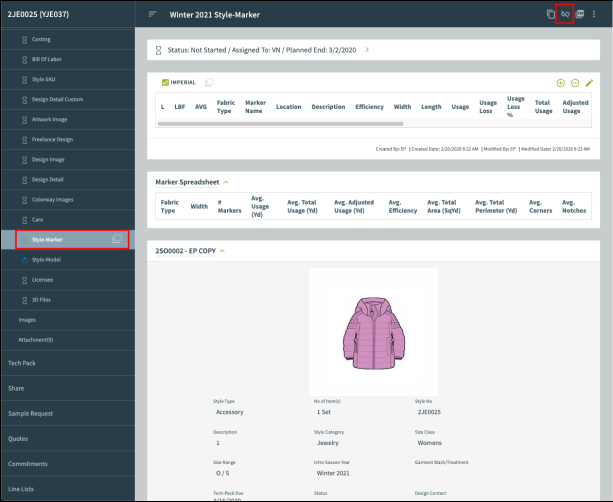
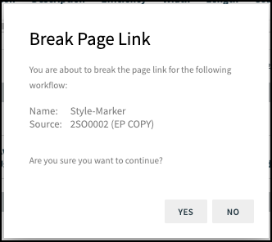
- Link/Break Link: This toggle button “connects or disconnects” the current image from the Image Folder. Editing and updating linked images will apply the changes globally. Break the link if the edited image is only for the selected style.
- Preview: Create a report containing the Style Marker details.
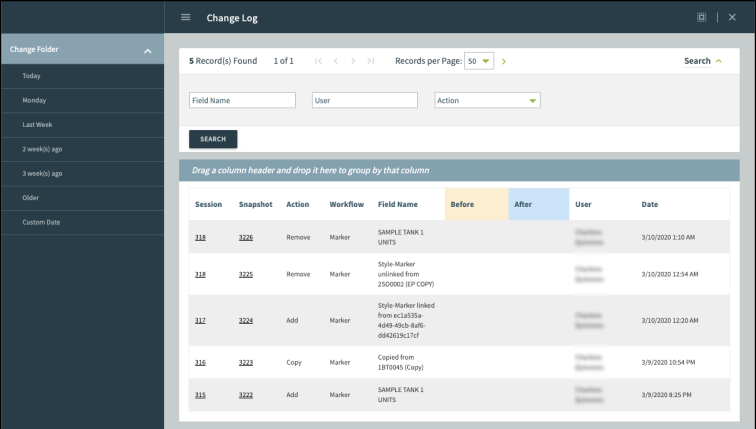
- Change Log: Lists all additions and modifications made within the Styles Marker page.
- Marker Area: Add pattern information from AccuMark’s storage database.
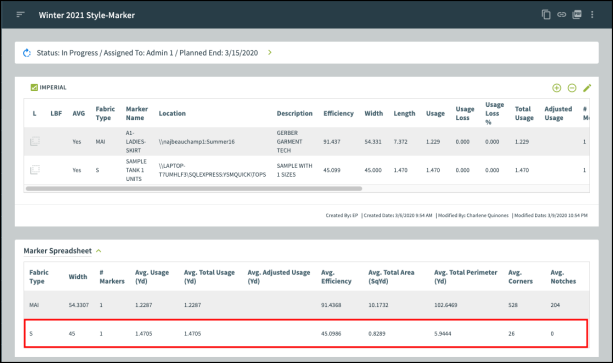
- Marker Spreadsheet: This is an averaging section matching Fabric Type and Width as criteria.
- Style Header Information: Expand the Style Header, using the green arrow, to reveal the Style’s details.
- Comments: Add a comment to share with other viewers.
Style Header Information
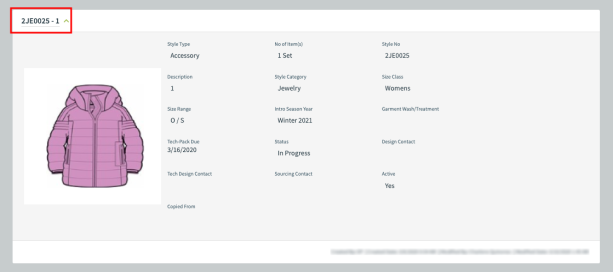
The Style’s details are listed within the style header information section of the Style - Marker page.
-
Click the top green arrow to expand/collapse the Style header information area.
Comments
Include a note or instructions affecting this style.
-
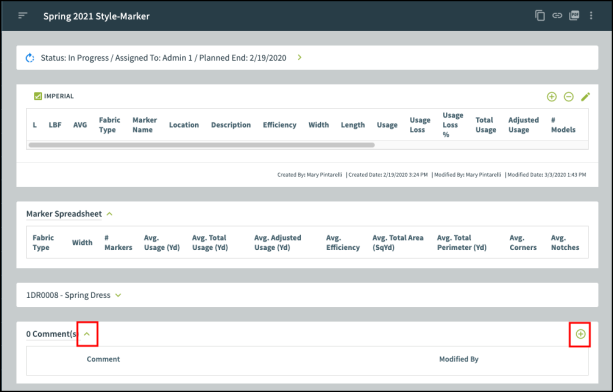
Click the bottom green arrow to expand/collapse the Comment(s) section.
-
Press the + Add New button, then type comments into the textbox.
-
Once finished, select the save button.

-
Now the newly added comment will appear in the Comment(s) section. Click the pencil icon to edit the existing comments or click the + Add New button to enter additional comments, if needed.

Add an AccuMark Marker
This most commonly used feature easily integrates AccuMark Markers into YuniquePLM.
-
Import a marker from the AccuMark database by clicking the add button. A new window opens.

-
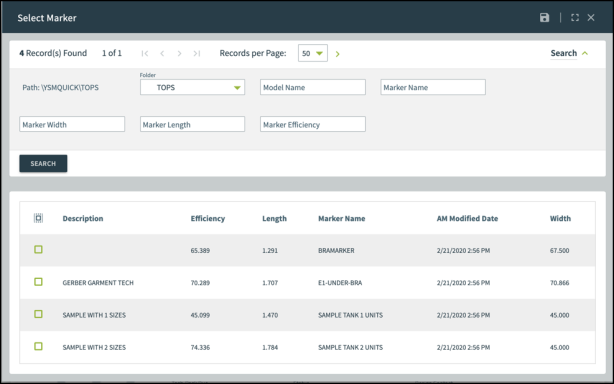
Use the Folder drop-down to navigate through AccuMark’s storage area hierarchy. This is where the desired AccuMark marker is saved. Note: An AccuMark PLM integration setup is required to add a Style Marker. Refer to the YuniquePLM AccuMark Integration user guide for further details.
The window refreshes once a selection is made from the folder drop-down. Select a marker from the list, then click save.
-
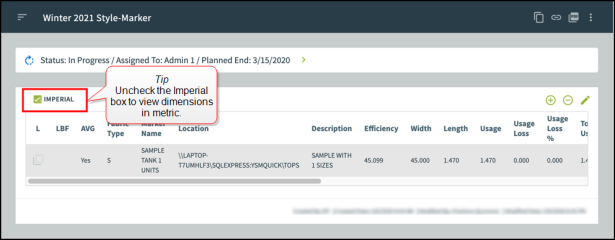
The selected marker will appear in the Style-Marker workflow main page. Each entry will contain the linked symbol and will update whenever the page is refreshed or reopened. If unlinked, then every field can be edited.
Copy Another Style’s Marker
-
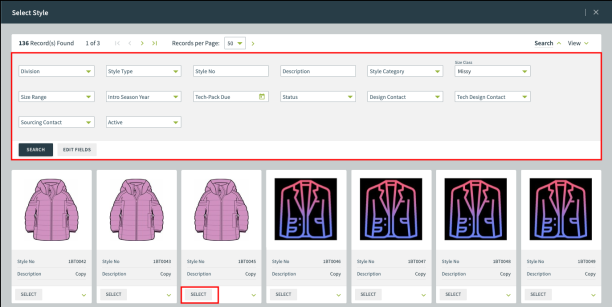
Another way to add a marker is to copy one associated to another style within YuniquePLM. Click the copy button to open its window.

-
Use the search fields to filter the selections accordingly and choose an appropriate style to copy the marker page. Click the desired Style’s select button. The page closes and returns you to the main Style-Marker page.
-
Now the copied marker items as well as the associated Marker Spreadsheets are listed in the Style-Marker workflow main page.
Link
Tie a Style-Marker to the current selection and seamlessly update styles when needed.
-
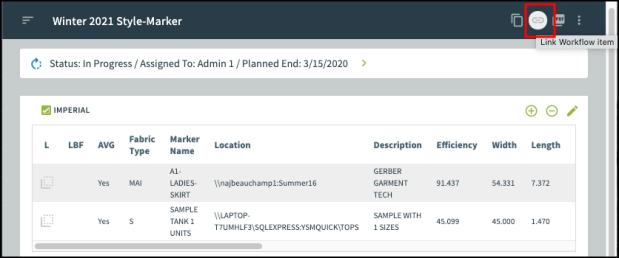
Link the current style to another by pressing the link button. A new window with a list of Styles is shown.
-
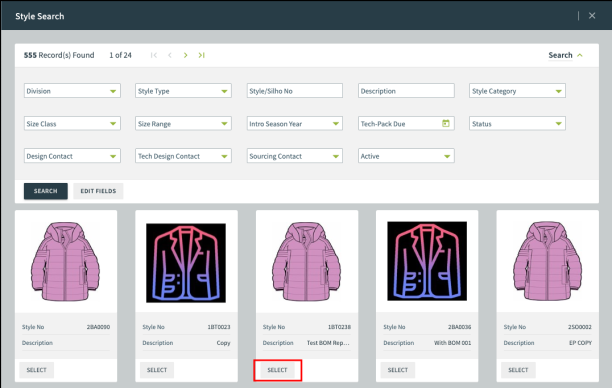
Locate a desired style from the list of available styles. Press the desired Style’s select button to link with the current style. The page closes and returns you to the main Style-Marker page.
-
The Style-Marker page now displays a Break Link button and the linked icon (within the left navigation bar) which signifies the link between both style-markers. If the style-marker is updated, the linked style will also update.
-
If a global update is not desired, select the Break Link icon then select Yes.
Edit a Marker
-
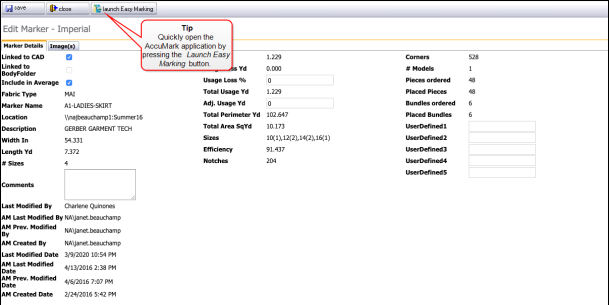
Click a desired marker row to view and edit the marker details within a new window.

-
The detail page opens with additional AccuMark information, as well as a button to quickly open the AccuMark application.
Within the Marker Details tab:
-
Include in Average will calculate an average of the markers with the same fabric type. If unchecked, the marker will not be included in the bottom averaging portion on the marker screen.
-
To utilize the Usage fields, both the Length and Placed Bundles fields must have a value greater than 0.
-
In the Usage Loss % field enter a multiplier like ‘1.02’ to calculate 2% of the Usage value.
-
The Usage Loss Yd/M will calculate when the page is saved.
-
The Adjusted Usage Yd/M value is an optional field where Yards/Meter values are expected but are not actually calculated from other fields.
-
Comments are only saved on the page and will display in the Preview printouts.
-
If there is not a check mark in the Linked to CAD field, then all other fields on the page will be editable and will not match the data saved by the AccuMark system. However, this can be rechecked and refreshed with the data from the AccuMark system as well.
-
Once changes are made to the Marker details tab, press save.
-
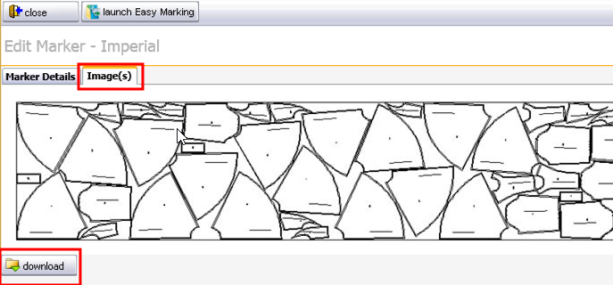
Click the Image tab to view the marker representation. Each image is downloadable by clicking the download button at the bottom of every image. Also, quickly launch the AccuMark application by pressing the Launch Easy Marking button.
-
Once changes are made, click close.
Remove Markers
-
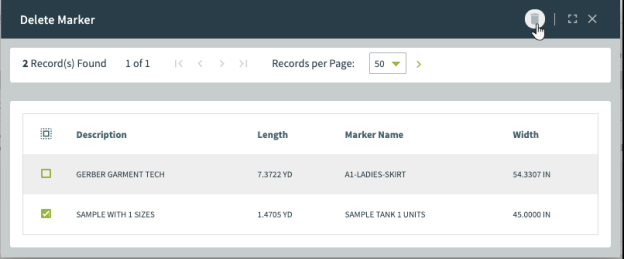
Delete existing markers by pressing the remove button. A pop-up window opens.

-
Place a checkmark next to each desired marker then click the trash icon to delete the selections.
-
A confirmation window opens. Select Yes to proceed or No to cancel. The popup automatically closes and returns to the Style-Marker main page.

Preview
-
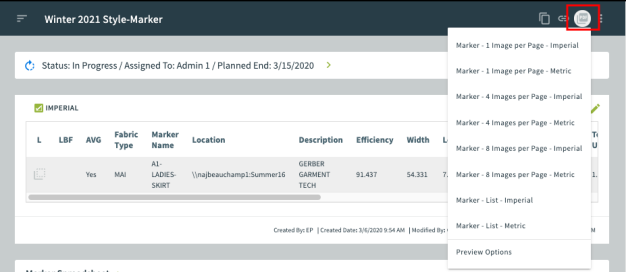
Generate a Style - Marker report by clicking the preview button. A drop-down opens to reveal a list of available reports.
-
Select a report from the list.
-
The user is immediately notified with two notifications, where the first states that the report is currently being generated, while the second states the report has been successfully generated. Click on the notification to view the report.
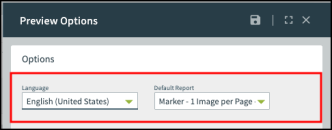
Note: Users may also select Preview Options located at the bottom of the list. This functionality allows the user to select a preferred language and default report. Keep in mind, these settings are specific to this workflow.
-
Click the Close button to return to the Style - Marker main page.
Change Log
Review a detailed list of changes made to a particular area.
For further information, refer to the Change Log User Guide.
