Palette Edit - Flash Costing
-
Click the Flash Costing link to edit flash costing details for styles within this Line List.
-
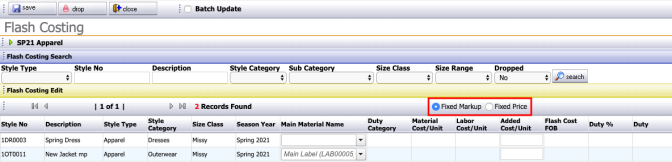
Search fields may be used to filter styles to display. Select either Fixed Markup or Fixed Price based on different types of business processes.
-
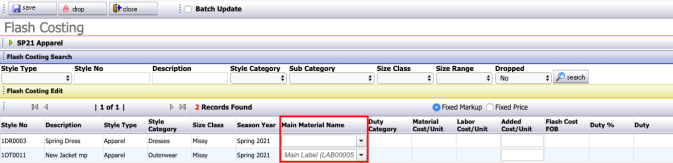
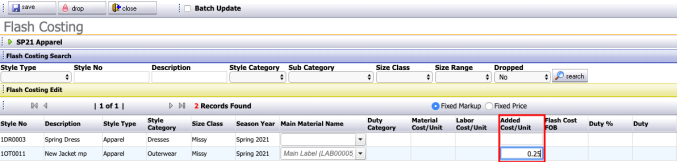
Select the Main Material Name for each style in the created line. This drop-down menu defaults to the main material selected in Flash Edit – Material. **Note: ONLY materials that have a duty category assigned in the material library will appear in this dropdown menu to select from.
-
Enter the Added Cost/Unit as needed.
-
Edit cost Variance.

-
Edit Wholesale Markup/Retail Markup, if Fixed Markup was selected.

-
Edit Wholesale Price/Retail Price, if Fixed Price was selected.

-
Click save to capture changes made to the style.
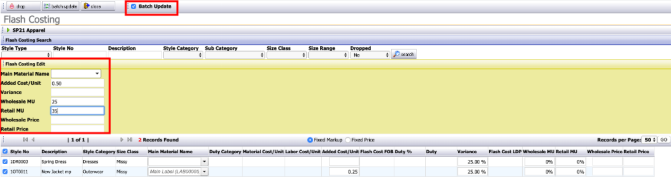
Batch Update
The Batch Update option allows users to mass-update flash costing info for the styles.
-
Select the Batch Update option. The screen refreshes and now contains a yellow Flash Costing Edit area.
-
Enter Flash Costing details in the yellow highlighted area.
-
Select multiple styles to be updated.
-
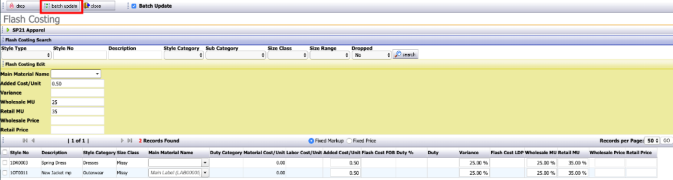
Click on batch update to apply changes to multiple styles at once.
-
Multiple styles have been updated. Uncheck the Batch Update option to resume to the normal view.

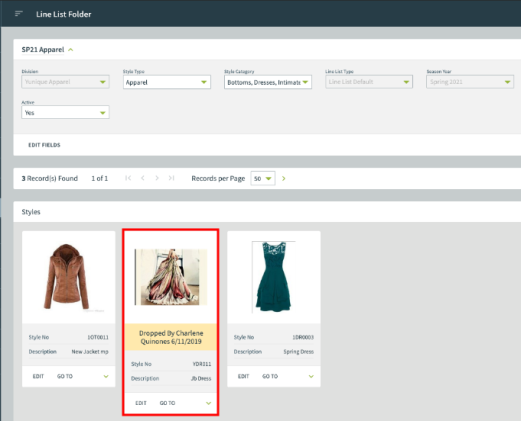
Drop Styles
Existing styles can be dropped from the Line List.
-
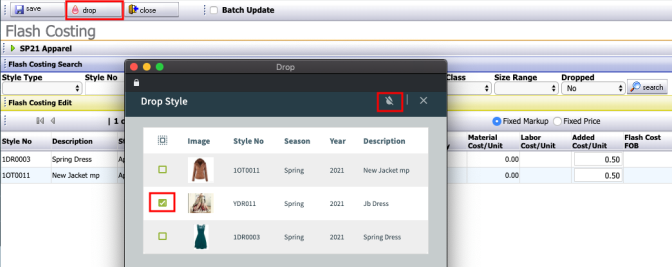
Click the drop button to open the Drop Style window.
-
Select styles to be dropped from the pop-up window then click drop.
-
A note will appear in the Style thumbnail image indicating that it has been dropped from the line list.
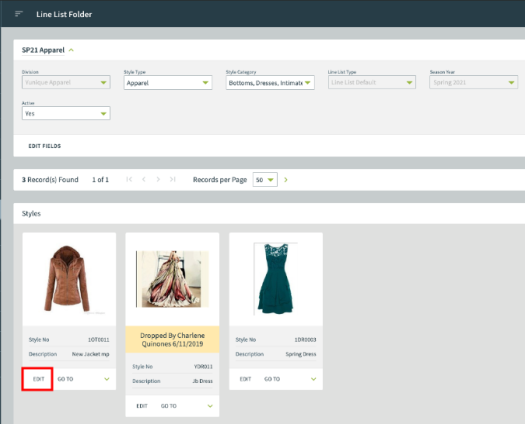
Accessing a Style
Once design image, color, and material have been added to styles within a line list, users have the ability to access a style directly from the line list main page.
-
Click the edit button at the lower left corner of an existing style.
-
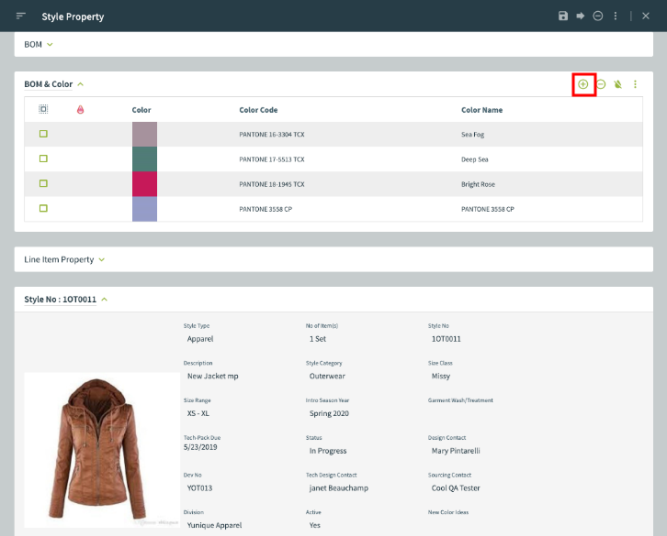
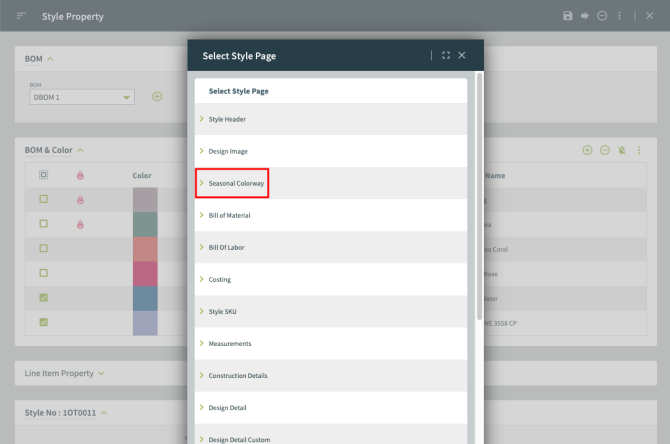
The style opens on a new page where a detailed summary is listed. Additional colors can be added to the style by clicking add which is located within the upper right corner for the BOM & Color area.
-
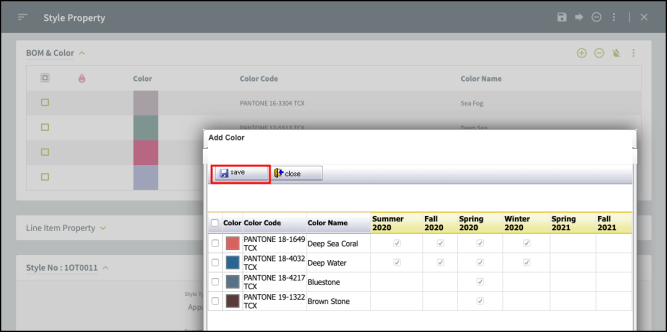
Additional colors imported from the style Seasonal Colorway page will appear in the pop-up window. Select appropriate colors to add and click save.
-
Newly added colors will appear in the Color list.
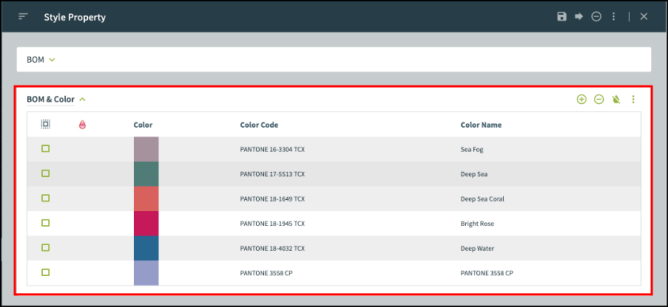
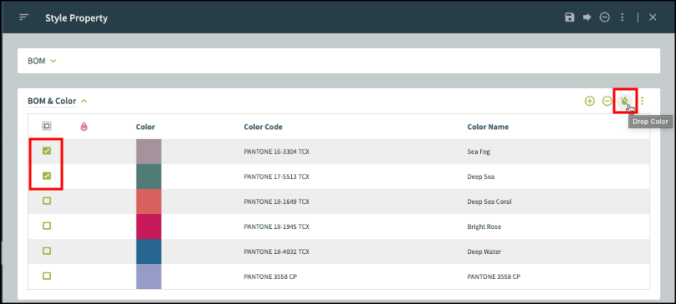
Drop Colors
Colors can be dropped from the Style using the BOM & Color area.
-
Select the colors to drop, then press the drop color icon.
-
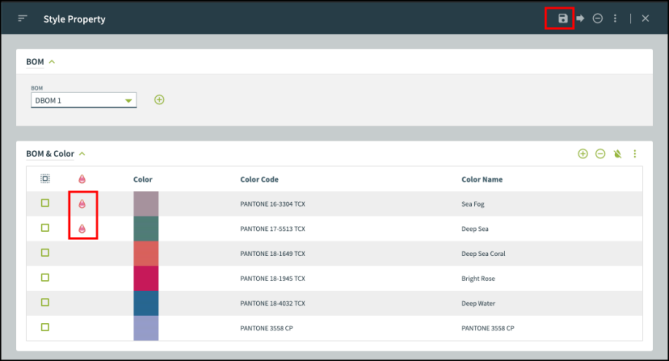
Once finished, click on save. An
 icon will appear in front of the dropped colors.
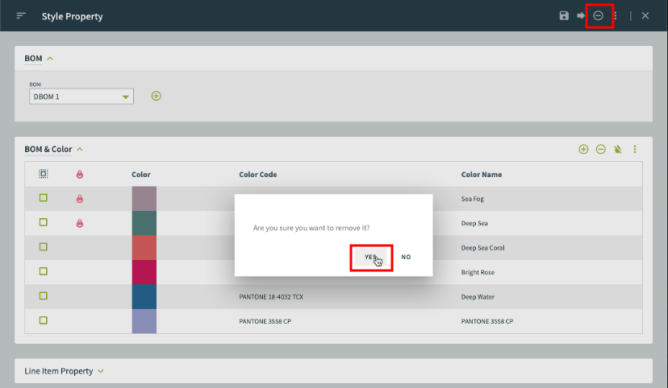
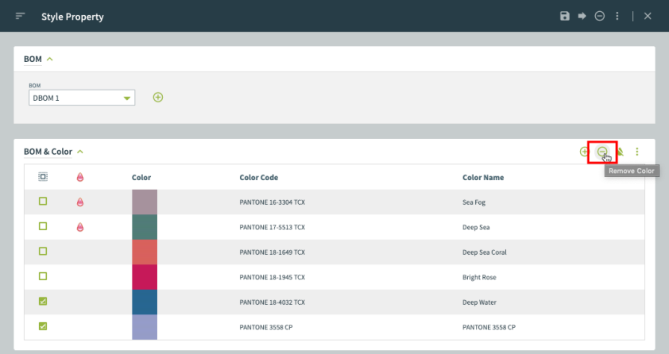
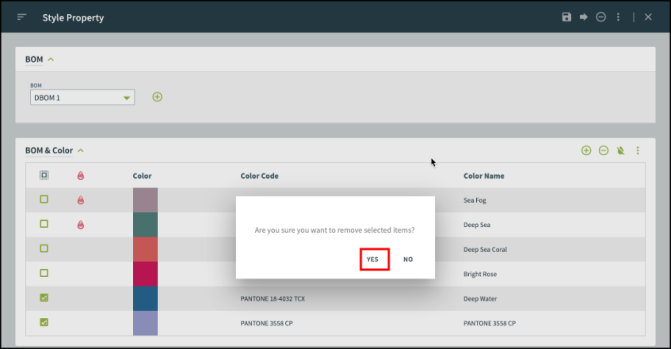
Remove Colors
Colors can be removed from the Style using the BOM & Color area.
-
Select the colors to be removed, then press the remove color icon.
-
A confirmation window appears. Confirm the removal of the items by selecting YES or decline by selecting NO. Selected colors will be removed and will no longer appear below the design image area.
Goto
Users can directly access a Style Workflow page from the Style Property window.
-
Click the go to (arrow) button across the top command bar.
-
Click a workflow page for it to appear in a new window.
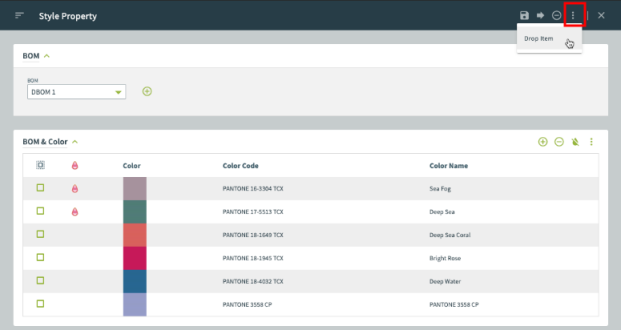
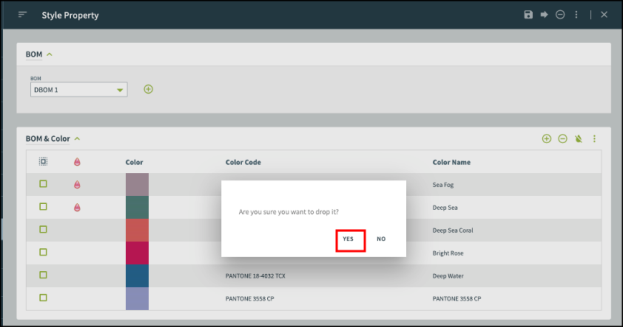
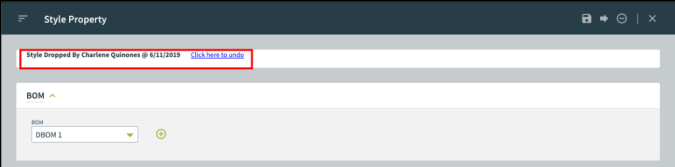
Drop Item
Styles can be dropped using the drop item button.
-
Click the overflow menu within the desired style. Then select drop item.
-
A confirmation window opens. Click YES to confirm or NO to cancel.
-
The style will be dropped from the line list. However, users have the ability to bring it back by clicking on Click here to undo. The style will still appear in the line list with a note indicating that it has been dropped.
Removing a Style
A Style can be removed from the Line List.
-
Click the remove icon across the top command bar.
-
A confirmation window opens. Click Yes to confirm. The style will be removed and will not appear in the Line List.