Steps to Use the Import from ERP Wizard
1. Order Settings: The first step in the wizard is to enter the information that is usually included in an AccuMark marker order. The required information includes the fabric width, the order name which will be used for marker naming, an annotation table, a laylimits editor and notch table.
Other optional order information can also be added if needed for the markers, including order number, description, target length or utilization, as well as shrink or stretch information. Storage Area location displays based on the location the data items are selected from.
2. Model Settings: The next step allows you to set the model information for the CSV file. Select the model or models for the CSV order, sizes for each model, quantity and fabric type.
3. The Job Settings display the Storage Area name. Here you select how the marker will be made, Automatically made with AutoMark or AccuNest , or manually placed using Easy Marking. Check boxes allow the marker to be plotted and a cut file created. The destination for the plot file, local or a particular plot queue is set here and the directory for export is also set here.
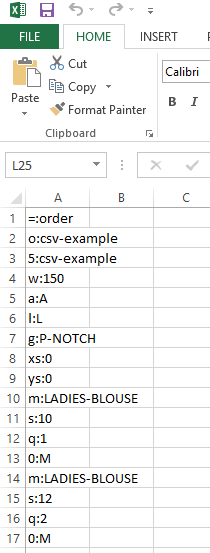
4. Once all the steps have been completed, the CSV file is ready for processing. The order can be directly submitted to Batch Processing or the CSV file can be viewed in Notepad or Excel. Once one CSV file has been created, this page also allows you choose to create the next CSV order file.
Here is a sample as viewed via Notepad and Excel:

|

|